Building a Microsoft Power Pages portal in 2026 is very different from the Dynamics Portals era most Dataverse teams remember. The underlying infrastructure is the same — same Dataverse, same web roles, same Liquid runtime — but the tooling around it has changed, and the fastest path to a production portal is not the one Microsoft documents first.
This guide walks through the full end-to-end build: provisioning a Power Pages site, connecting Dataverse, designing pages, wiring up security, and publishing. We'll use PortalForge to skip the Liquid authoring step — but the underlying flow applies even if you're using the native Power Pages Design Studio.
Provision a Power Pages site
Create the site in make.powerapps.com and note the site URL + website ID.
Plan your Dataverse schema
Map tables, relationships, and how records relate to the signed-in user.
Design pages on a visual canvas
Drag-and-drop data grids, forms, charts, and KPI cards — bind them to Dataverse.
Wire up security with web roles
Create roles, attach Table Permissions with Contact/Account scope, and link to roles.
Test with preview personas
Validate every page as each web role before going live.
Publish and monitor
One-click publish, verify anonymous + authenticated flows, enable Application Insights.
Prerequisites
Before you start, make sure you have:
- A Power Platform tenant with a Dataverse environment (any licensing tier works — trial included).
- A Microsoft 365 admin account OR a user with the System Administrator role in Dataverse.
- A Power Pages license (included in most Dynamics 365 SKUs; there's also a standalone pay-per-authenticated-user plan).
- At least one Dataverse table you want surfaced in the portal — a contact, case, opportunity, or custom table all work.
Step 1: Provision a Power Pages site
In the Power Apps maker portal (make.powerapps.com), switch to the environment where you want the portal, then navigate to Power Pages. Click Create a site, pick a template (blank is fine — we'll replace it), and give the site a name. Microsoft provisions the site asynchronously; it usually takes 5–15 minutes.
While you wait, note two things: the site's URL (e.g. contoso.powerappsportals.com) and its website ID (visible under Site Settings). You'll need the website ID to wire up web-role filtering later.
Step 2: Plan your Dataverse schema
Before designing any pages, decide what your portal is for. Most portals fall into one of five categories: customer support, partner management, employee self-service, vendor onboarding, or event registration.
Each shapes your Dataverse schema differently. A support portal leans on the standard contact and incident tables; a partner portal uses account, opportunity, and custom commission tables. Map out which tables you'll read from, which you'll write to, and — critically — how each table's records relate to the signed-in user.
This last point drives your security model, which is the single biggest source of pain in a Power Pages build. Don't skip it.
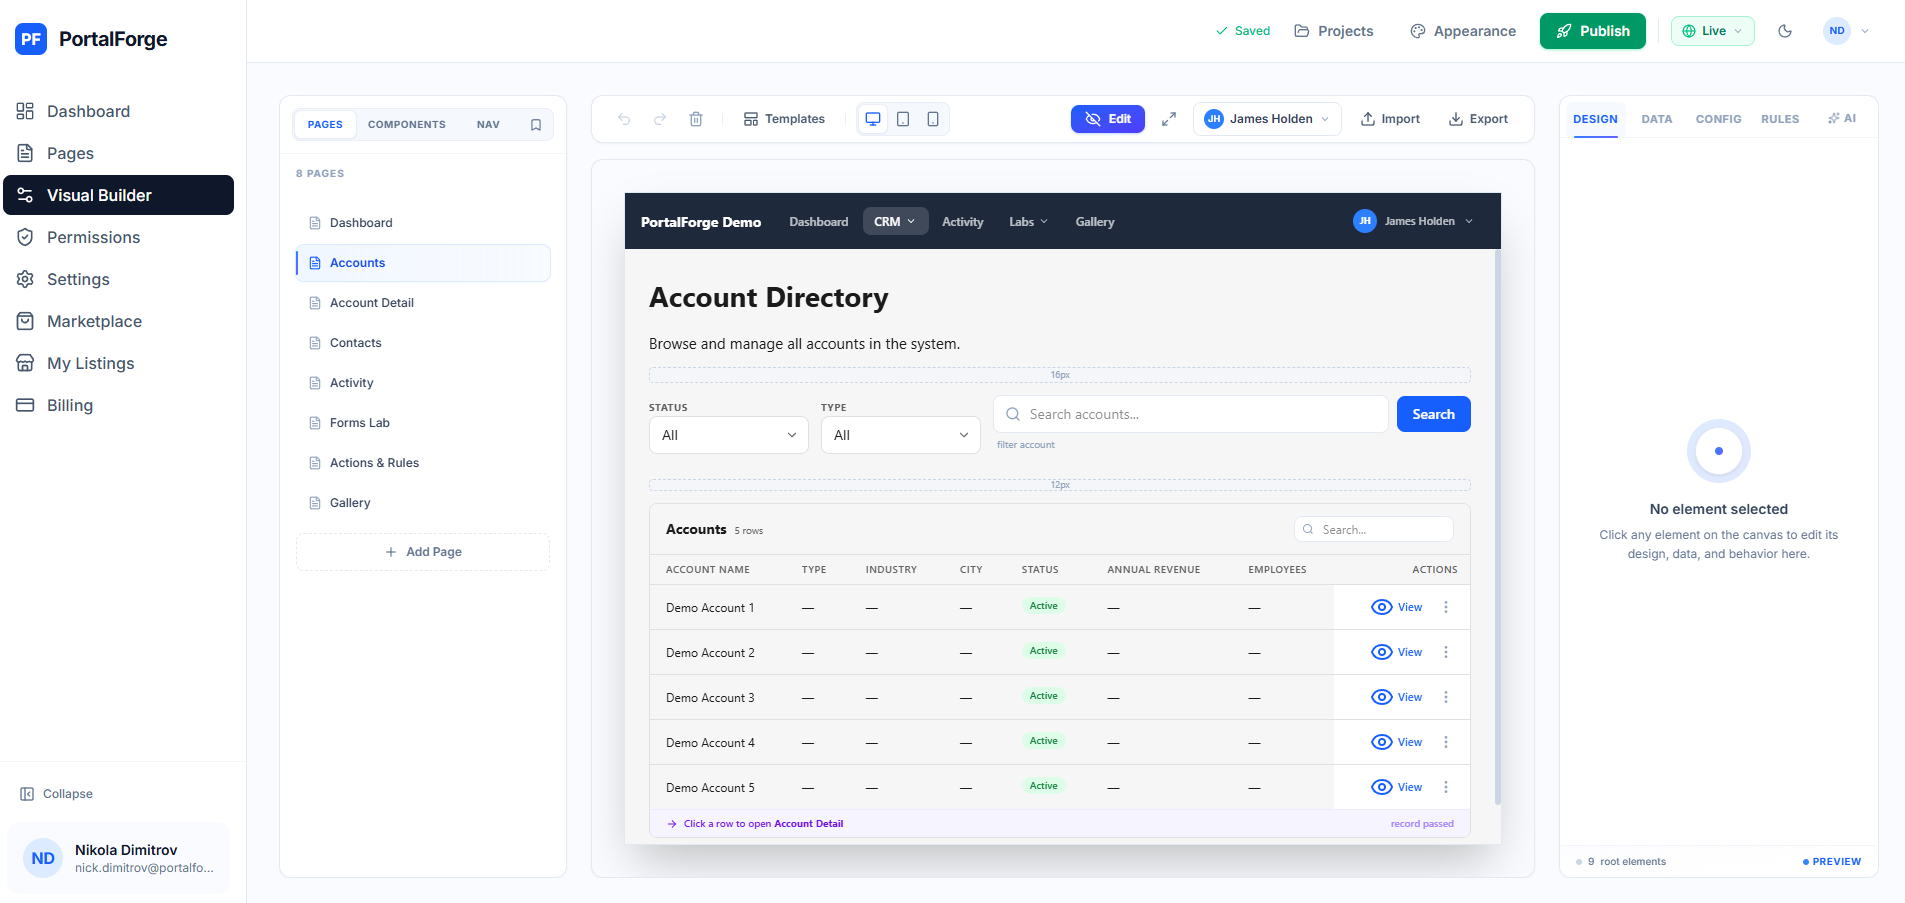
Step 3: Design pages on a visual canvas
The native Power Pages Design Studio gives you a page editor, a few layout blocks, and a code view for Liquid templates. For anything beyond a static marketing page, most teams end up in Liquid — which means file-based authoring, manual OData queries, and 15-minute cache waits between every deploy cycle.
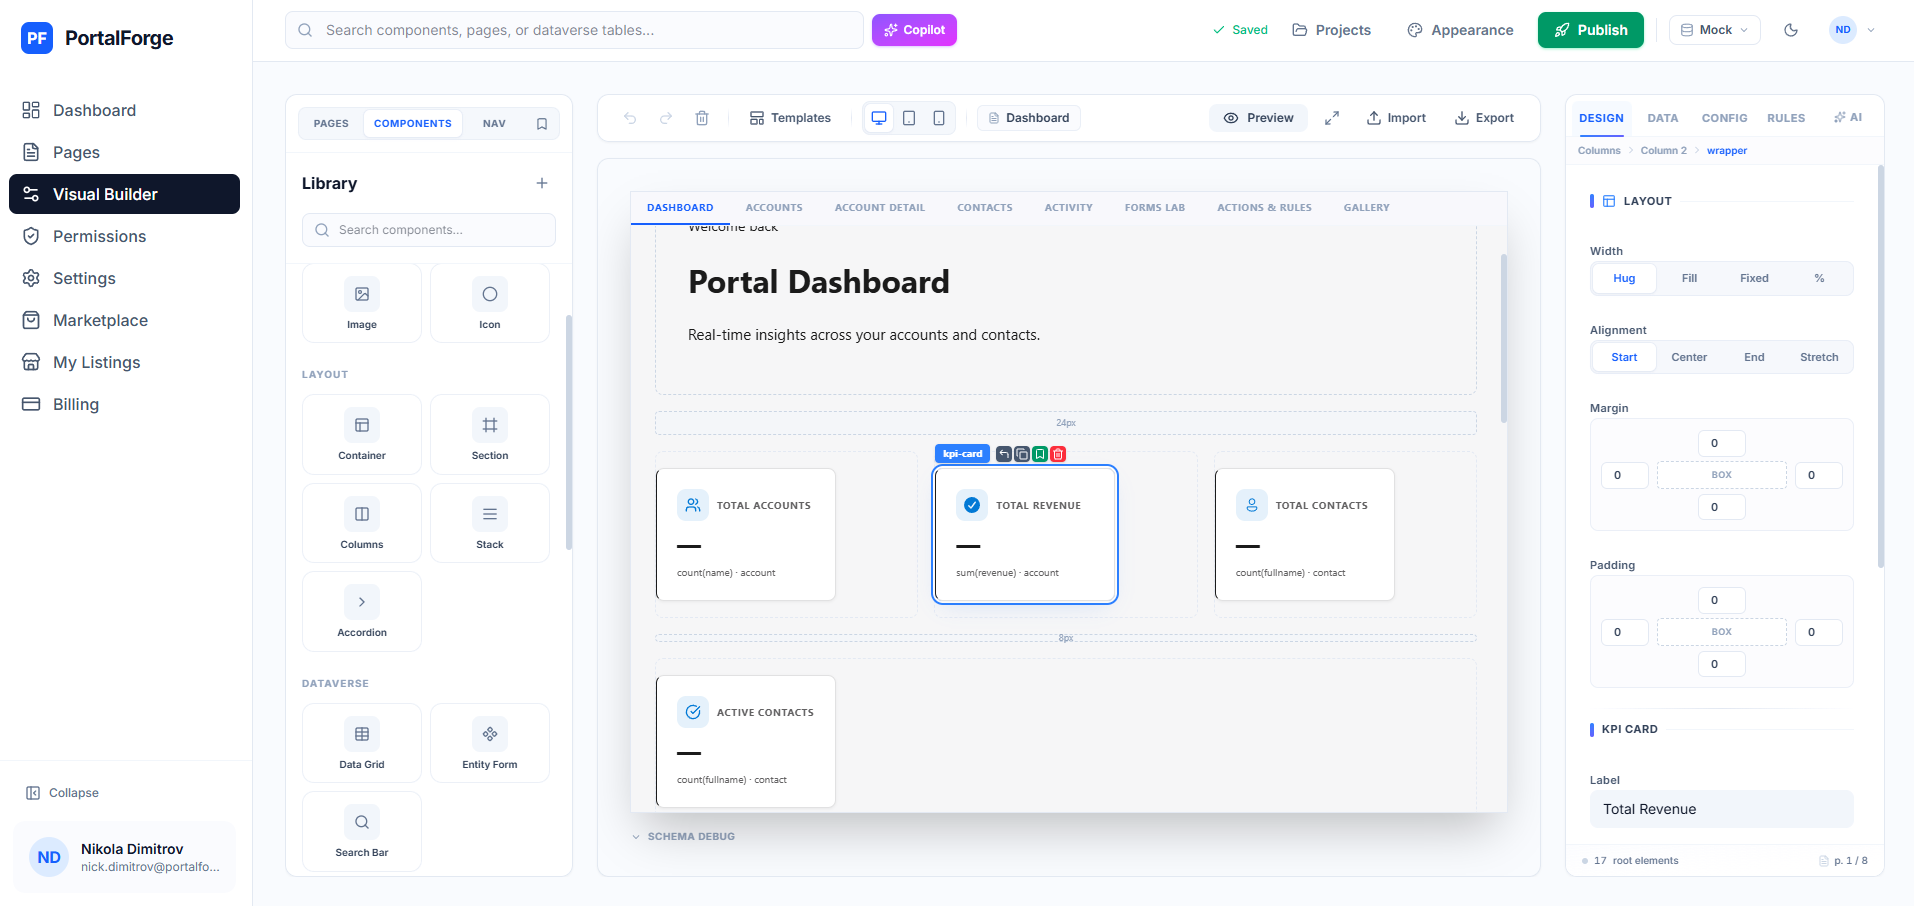
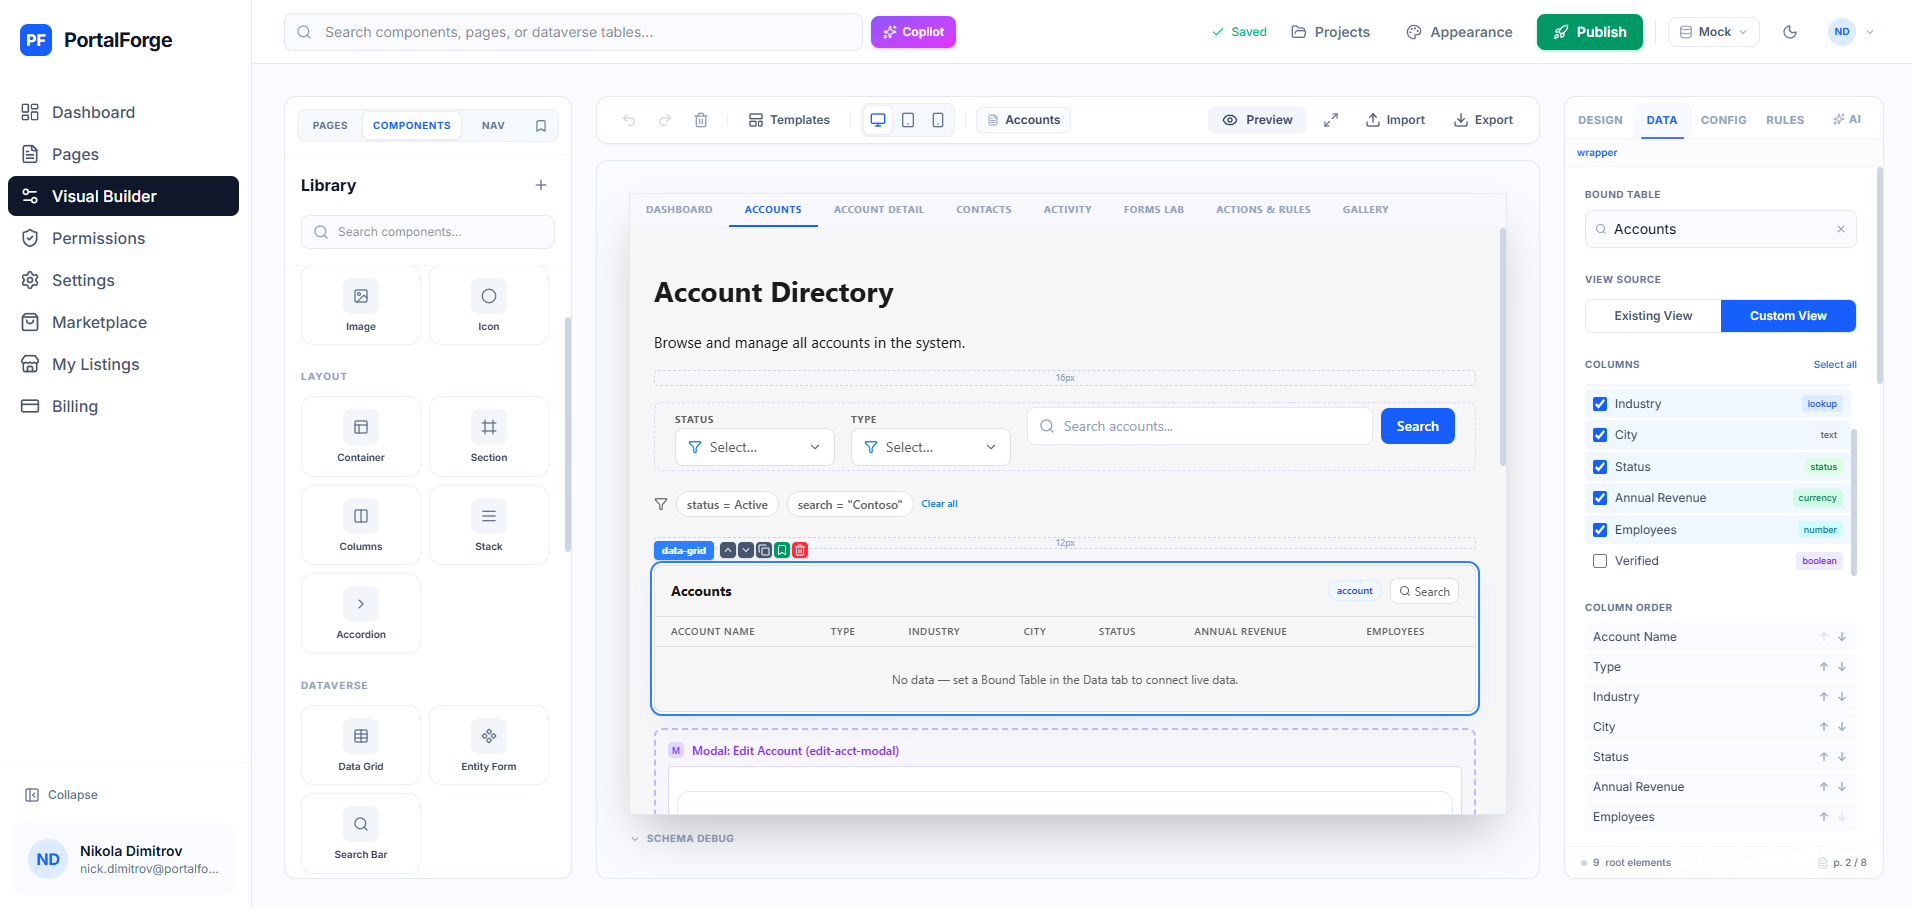
In PortalForge, you design the same portal on a drag-and-drop canvas. Drop a Data Grid, point it at incident, pick columns, and live data appears instantly. Forms, charts, KPI cards, and role-based visibility all come from the same visual interface. When you're happy with a page, one click compiles everything to a React SPA plus a Liquid host template and pushes to your Power Pages site.
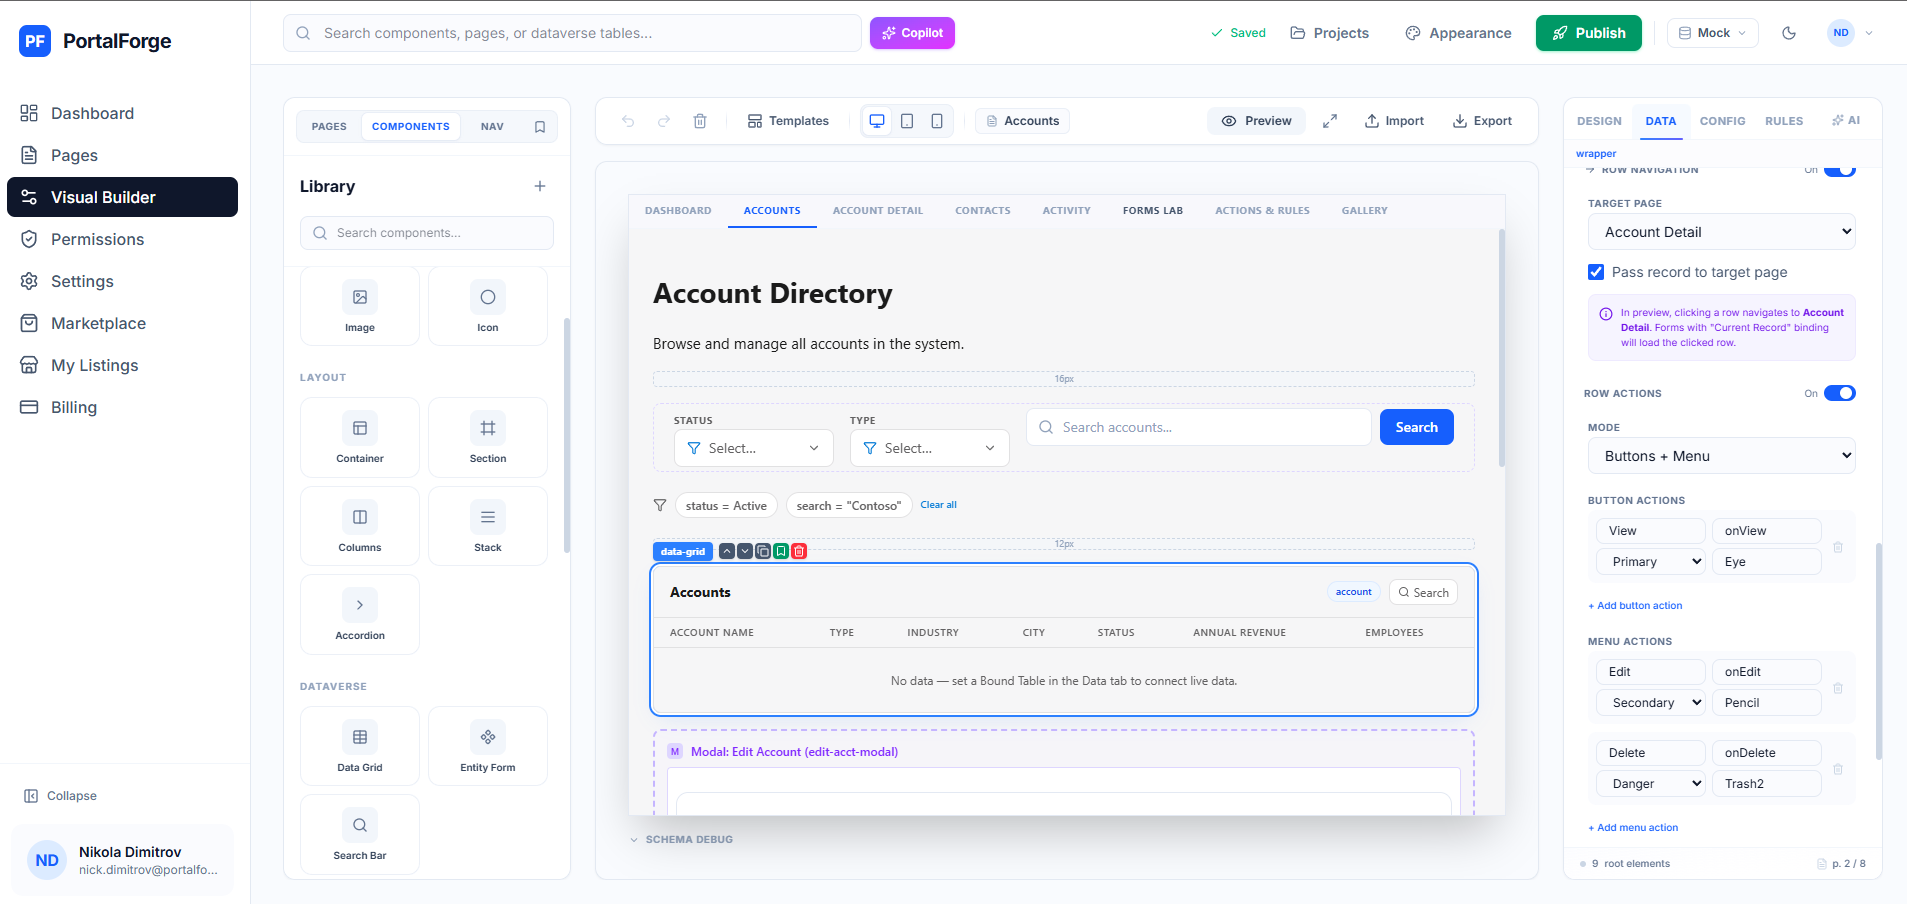
Either way, the design goal is the same: minimize clicks to the most important action (submit a case, register for an event, check deal status) and make sure users see data that belongs to them, not the whole table.
Step 4: Wire up security with web roles
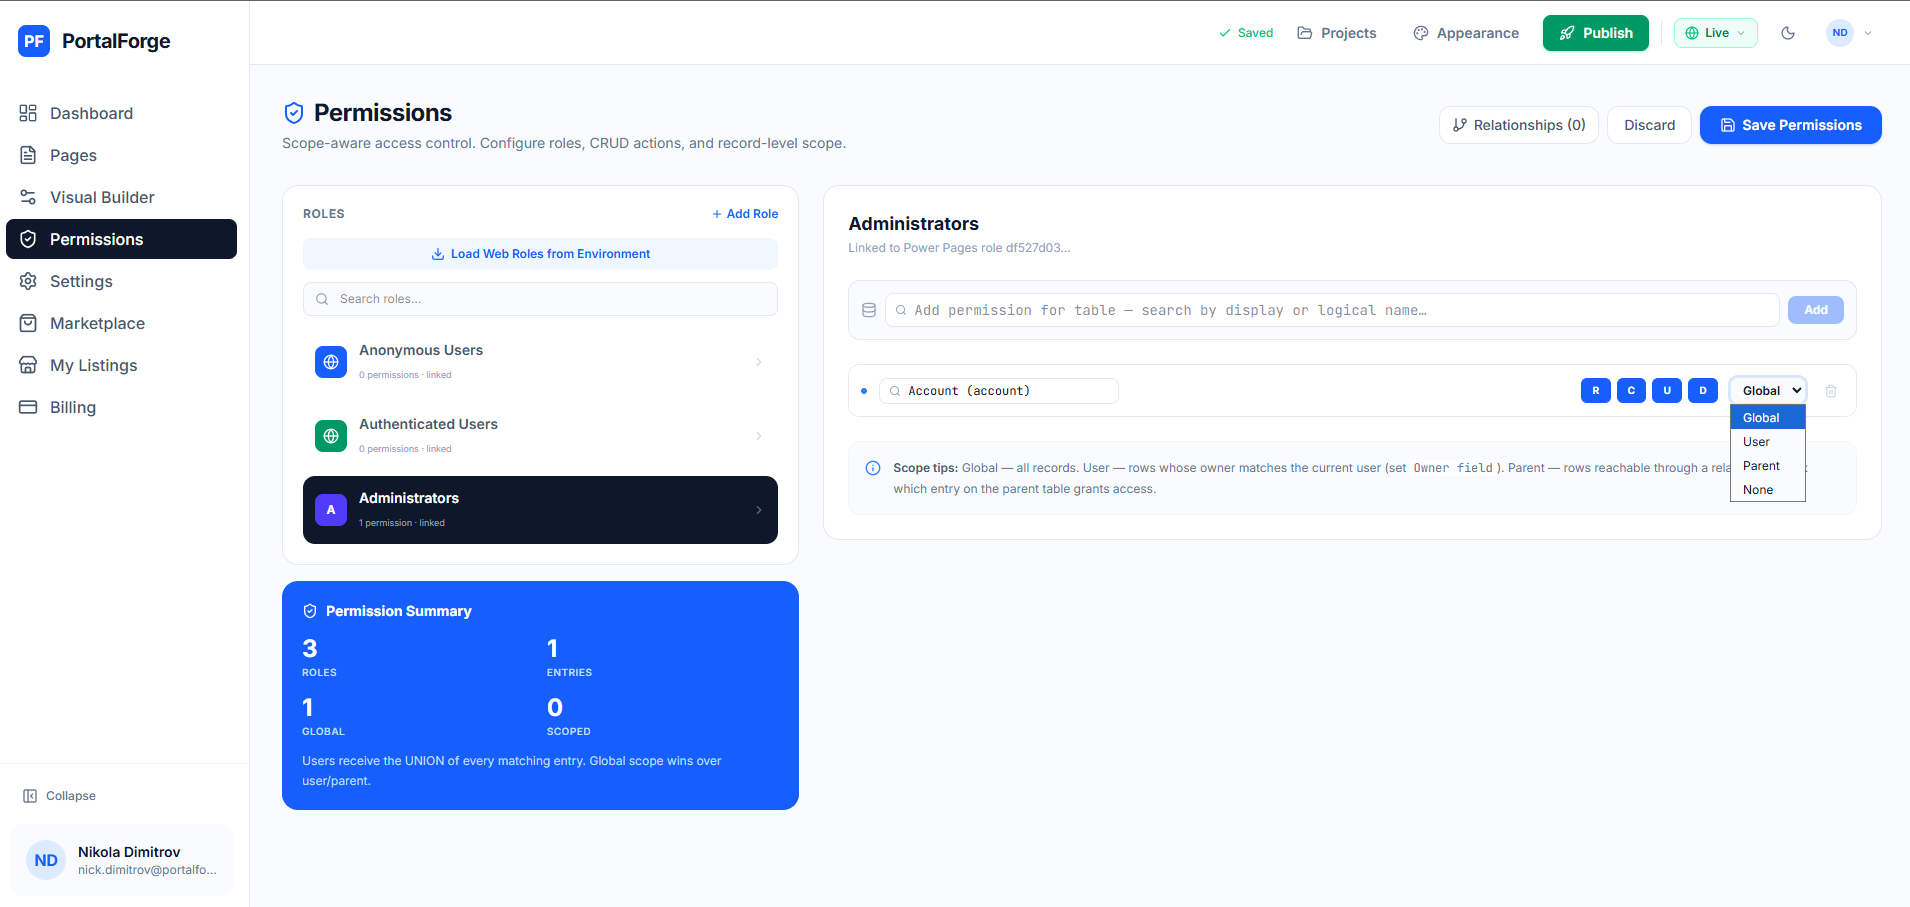
Power Pages security is driven by web roles. Every authenticated user holds one or more web roles, and every Dataverse table permission targets one or more web roles. The pattern to learn:
- Create the web roles you need (e.g. "Customer", "Partner Admin", "Internal Staff").
- For each table the portal reads/writes, create a Table Permission with read/create/update/delete flags.
- Link each Table Permission to the web roles that should be granted it.
- Set the scope: Global (all records), Contact (records tied to the signed-in contact), Account (records tied to the signed-in contact's parent account), or Parent (records reached through a relationship).
The Global scope is tempting and almost always wrong. Real portals use Contact or Account scope for anything customer-facing. PortalForge's scope-aware permissions editor lets you define this visually and previews exactly what each role sees before you publish.
Step 5: Test with preview personas
The number-one cause of Power Pages security incidents is table permissions that work in development but expose wrong data in production — because nobody tested with real role assignments before publishing.
Before publishing, test every page as each web role you defined. If "Customer" is supposed to see only their own cases, flip into persona mode as a specific customer contact and confirm the grid filters correctly. Then do the same for "Partner Admin" to verify they see all cases under their parent account.
This is where most Power Pages deployments fail silently: roles get defined, table permissions get set, but nobody verifies the outputs. A fetchxml typo or a missing relationship in the permission scope means the wrong data leaks to the wrong role — and Power Pages will happily serve it.
Step 6: Publish and monitor
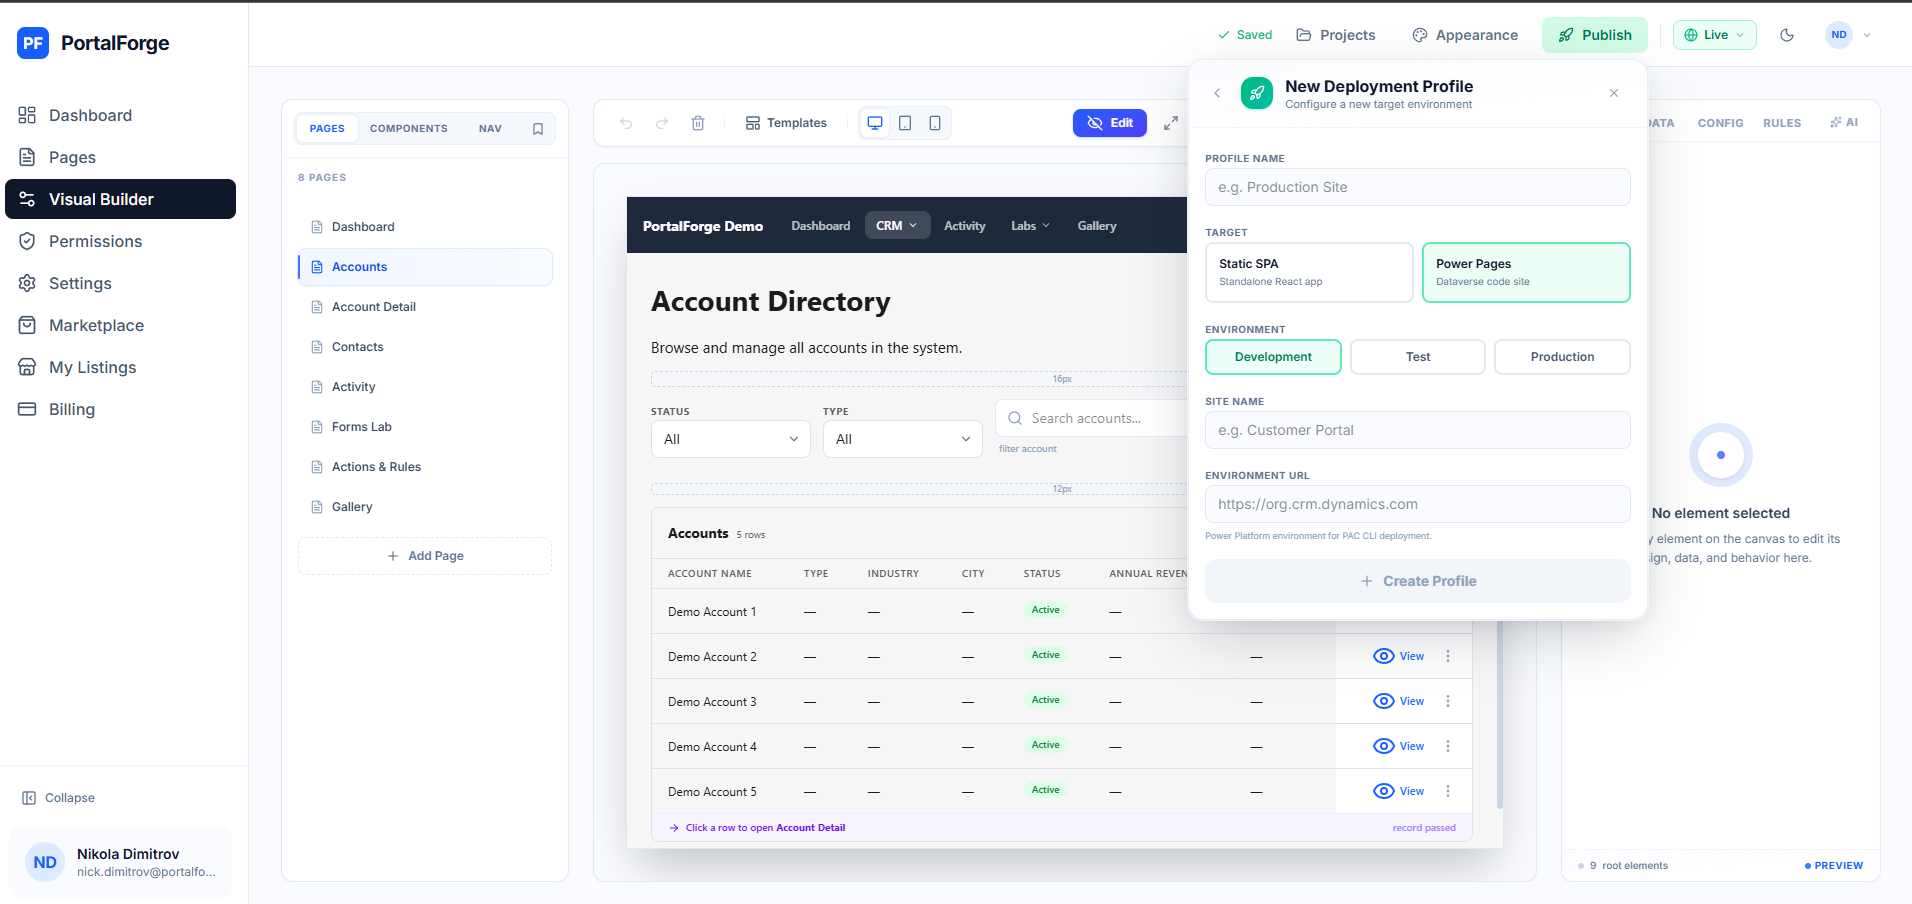
Publishing pushes your pages, templates, and table-permission configuration to the live site. Propagation is near-instant in 2026 (it was the infamous 15-minute cache in the Dynamics Portals era — no longer). Hit the site URL in an incognito browser to verify the anonymous flow, then sign in with a test contact to validate authenticated flows.
Turn on Application Insights for your Power Pages site — the one-click integration surfaces page load times, failed OData calls, and authentication errors. Monitor for the first few days, iterate fast, then shift to a weekly review cadence.
Wrap up
You've gone from zero to a production Power Pages portal: Dataverse schema, visual design, scope-aware security, role-based preview, and a live publish. Total elapsed time with PortalForge: typically under half a day. The same build in raw Liquid templates takes most teams 2–3 weeks.
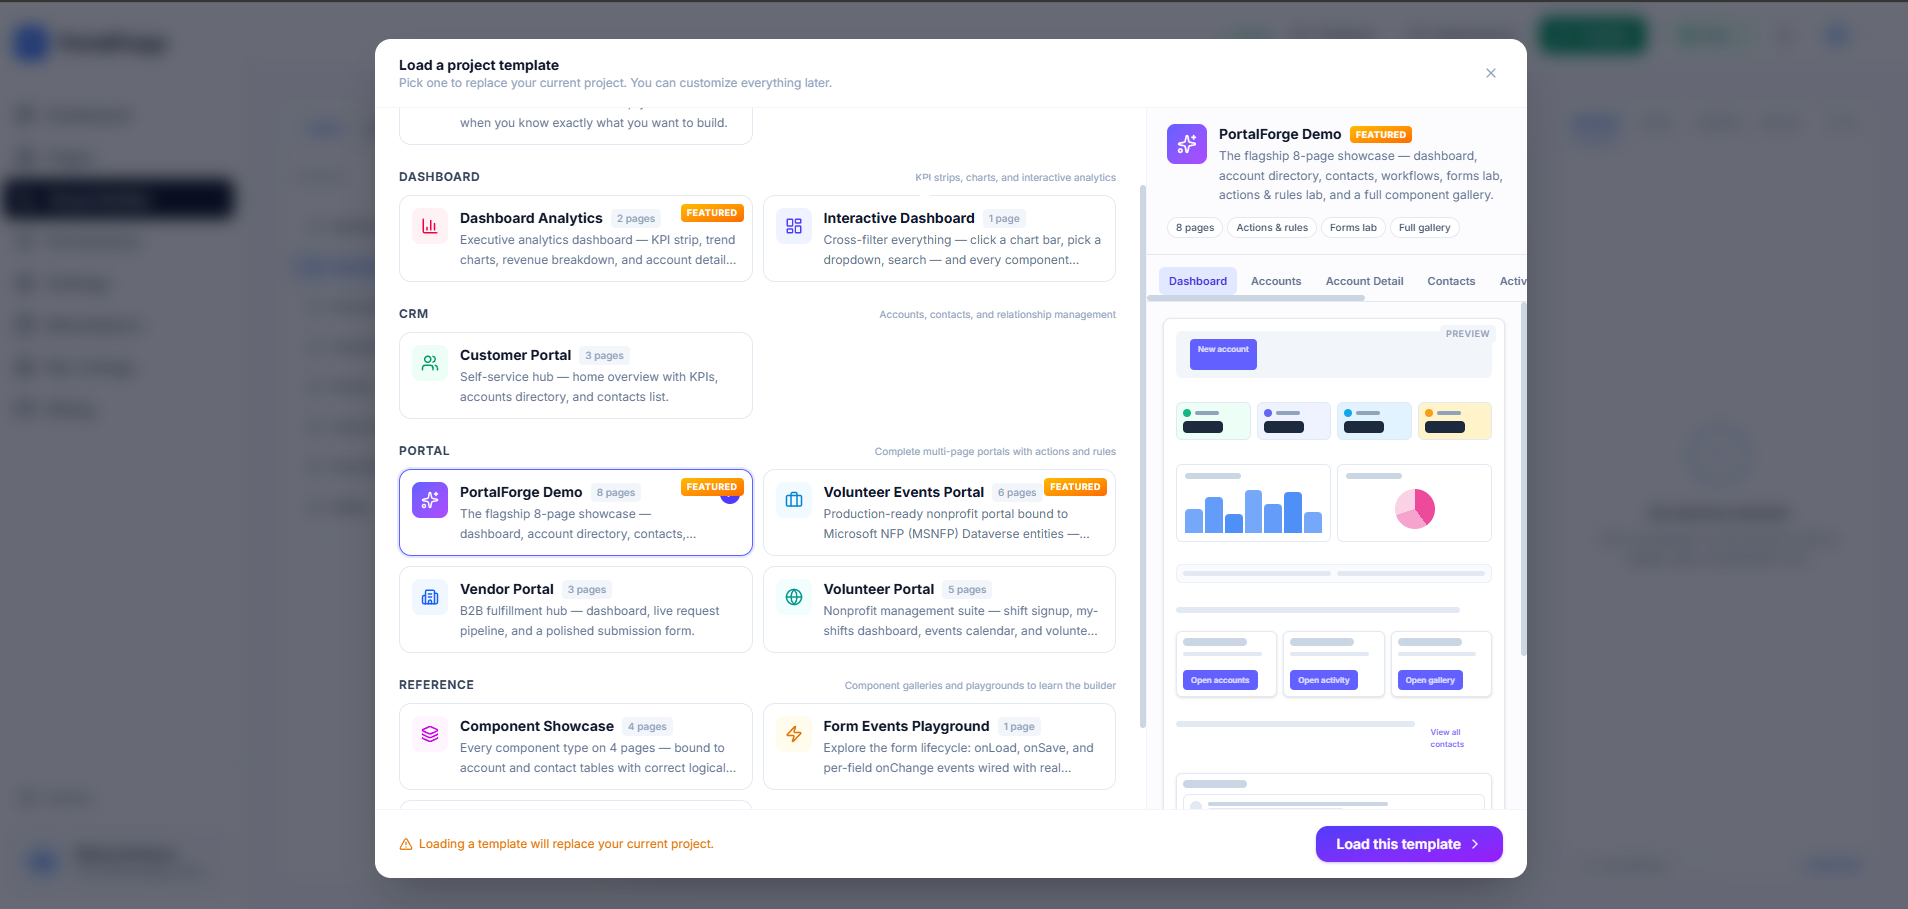
When you're ready, grab one of the production templates as a starting point or read the full docs.